
Focus-stacking photography: Building your own system
- Andrew Johnston
- Jun 17, 2025
- 10 min read

Updated: Nov 4, 2025
Ten years ago, Alex Wild published a guide in Scientific American on how to make your own focus-stacking system for under $6000. I can't seem to find that post any more, just some secondary posts with broken links to the original. Here is my own version of an off-the-shelf DIY build in 2025 for under $3000 (laptop not included).

Why a focus-stacking system?
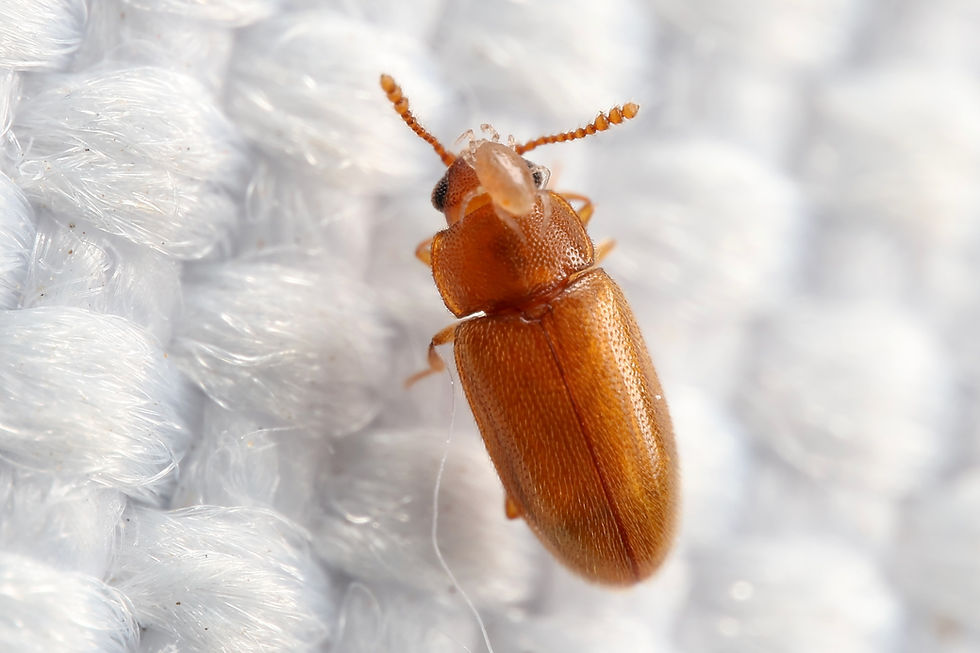
In short, insects are small and when you take a macrophotograph of one that is highly magnified and sharp, you cannot get the whole insect in focus in a single shot. For several decades, entomologists and collections workers have been taking focus-stacked images where a camera is moved up and down a rail system where it takes images at multiple focal planes. Those images are then stitched - or stacked - into a single composite which is entirely in focus. These systems and the images they generate are important for scientific communication, insect taxonomy, creating diagnostic tools, and a whole host of other uses.
This post will cover:
Functional elements of a focus-stacking system
Suggestions for cost-effective products available on the market today
Several recommendations for building imaging protocols
Excellent commercial options are available for those with the budget and they come with documentation and support - which is worth the cost for many or most institutions! This post is for those who can't handle a price tag of $30-100k or who enjoy a bit of DIY work.
Elements of a focus-stacking system
Any system will require these basic elements to focus-stack reliably.
Camera and macro lens(es)
Rail system to move the camera and/or subject in relation to each other
Lighting (soft, diffuse and bright light is crucial)
Computer and software to operate the system and create output images
Peripherals and optional components

Camera and Macro Lenses
Any modern major digital camera brand can work - and if you already have some photography equipment then it might make sense to use that format to build your system. I highly recommend Canon cameras because, from my experience, they are the only platform that easily connects to a computer for live view and file transfer easily.
You will need a camera body and lenses that give you the range of magnification needed for the subjects you with to photograph. The classic range for insects is usually 1x-5x magnification (or 1:1 to 5:1 ratios in photography speak). See the bottom of this post for options to go from 10x-50x magnification if you need that as well.
My suggestions for 2025 are these items which can be purchased from any major supplier:
Canon RP mirrorless full-frame camera (~$800 for the body without a lens)
Venus Optics Laowa 100mm f/2,8 2x Ultra Macro Lens (~$450, takes photos up to 2x magnification. Make sure you get the RF mount version for the Canon RP, or the corresponding mount for your camera body)
Venus Optics Laowa 25mm f/2.8 2.5-5x Ultra Macro Lens (~$450, gets you up to 5x magnification. Again get the RF mount or whatever matches your camera) November 2025 update - I would now slightly prefer the AstrHori 25mm 2-5x lens (~$250) following our recent lab tests.
This is the most expensive part of the system and will run $1600-$1700. This camera and lens combo can also be used for handheld macrophotography of insects in the lab or in the field as well. You could save several hundred dollars by buying used gear or purchasing a Canon Rebel (and corresponding EF mount lenses). Check out reviews of all these products on YouTube if you like. They are widely used by photographers and I have purchased multiple units of each of these items in my lab - all of which have been workhorses without fail.
Rail System
This element can be further divided into the actual moving rail and the structure it is mounted to.
Macro Stand. In years gone by, folks would mount their system on copy stands. I have also made my own homemade systems using a piece of plywood and a triangular bracket for a closet shelf. This works just fine and only costs a few bucks, but I now I fully recommend purchasing a premade system which is sturdy, portable, and very sleek - and reasonably priced!


Macro Rail. The old classic here is the Cognisys stackshot. I have one and have used many - they are great. However, I have recently switched to a less expensive system. The controls are a little different but it provides bluetooth connectivity and is a little sleeker design. I would recommend this deep dive by Allan Walls on Youtube if you are unsure of which to use.
My recommended gear is:
WeMacro Vertical Stand 2.0 (~$150, you only need the vertical stand, but you could get the horizontal adapter if you want. I have never used it)
WeMacro 100mm Rail (~$330, make sure you get a trigger that works with your camera, the Canon 1C adapter for the RP body)
2x 11" Magic Arms (~$30-$40, you can buy them from WeMacro in one purchase, or from other vendors and brands and maybe save a few bucks)
These well-designed and commercialy available components will set you back a bit over $500. If you go the StackShot route, you'll have to drop another $300 or so. Once these are assembled and your camera is mounted - you are almost ready to take pictures! Except for lighting.
Lighting Solutions
This is where we move a little from science into art. For most applications, an even, diffuse lighting is absolutely critical in order to fully illuminate your subject and expose the wonderful textures and features of your insect subjects. There are many ways you could go here. Typically you will either use a set of speed lights (classic camera flash technology) or a set of LED light panels that deliver continuous lighting. The downside to the LED panels is that it can be very difficult to get enough light for anything over 2.5x magnification. However, they allow the user to see exactly what the shot will look like before you take any pictures and the output is typically more even than flashes can be, which will typically vary a little bit from burst to burst, especially in more affordable models. I still recommend using flashes. I have tried several LED options, but have come back to Godox units. I use them with rechargeable AA batteries and have no issues whatsoever - but you might try something else!
You will need a flash trigger and 2 flash units that all work together and are compatible with your camera. My inexpensive recommendations are below:
2x Godox TT600 flash units (~$120 together - I have been happy with my various Godox flashes and I like that you can interchange triggers and flashes of different models easily)
Godox X-Pro-C Flash Trigger (~$70, make sure you get the model for your camera brand)
November 2025 update - I have begun using 3 Cinepeer 25W light panels instead of flashes (~$60 each, $200 total if you also purchase 3 30W USB charging bricks). They have enough powerto take images up to 20x with this system, but the Godox flashes above still do better when there is some vibration present (either a shaky table/floor you cannot control or doing super high magnification shots).
Along with the light source, you will need diffusion. There are all sorts of options available here Many people use velum or tracing paper to make a small cylinder to place around their staged subject. Others 3D print semi-circular domes to bounce the light nicely within. I am a simple person and use a cheap styrofoam coffee cup. I cut the bottom of which makes a nice tapered cylinder and diffuses the light nicely. A gray background is also often recommended, but for that see below under optional accessories!
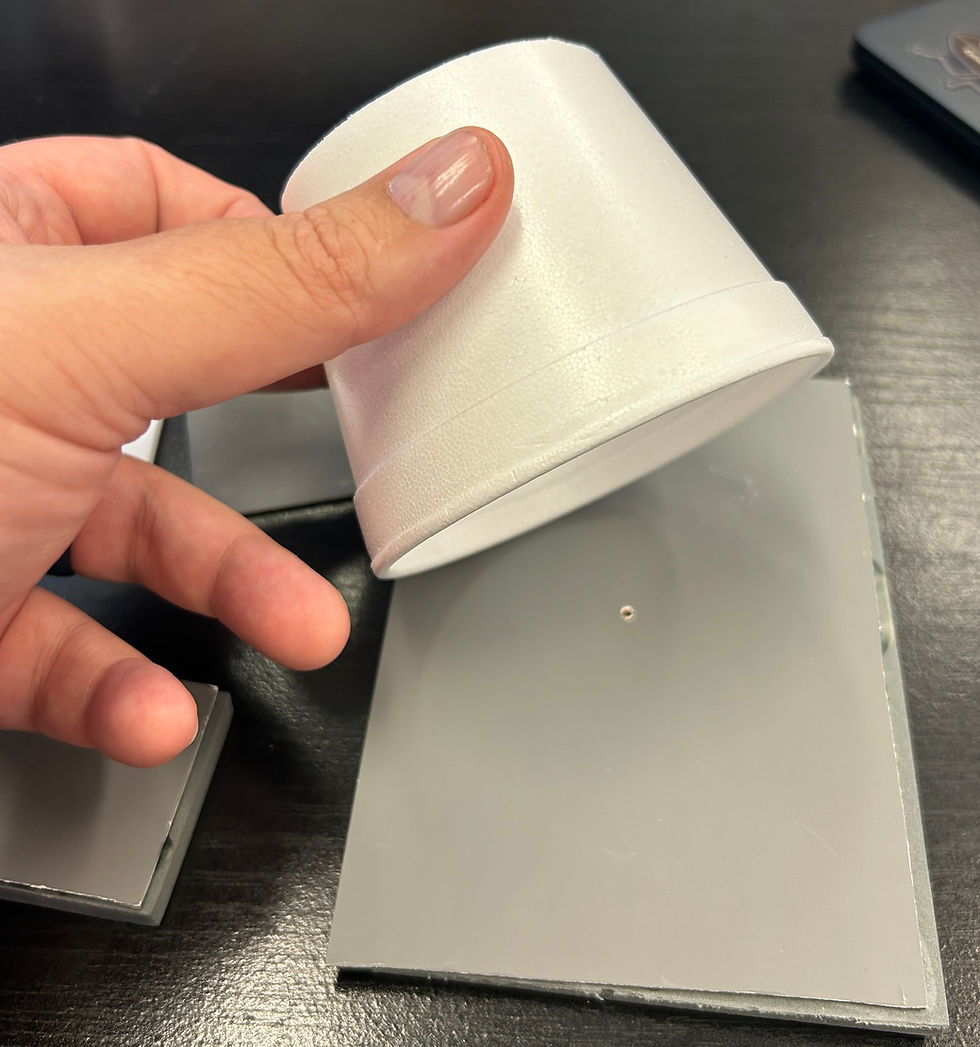

Assuming you go with a (nearly) free option of upcylcing some tracing paper or a styrofoam cup, this flash system will run about $200.
Computer and Software
I am going toa ssume that you have a computer already that can run this system. I use macs, but PCs work just as well. A 5-year-old M1 Macbook Air runs everything I need just fine. Anything with an OK processor or graphics card should work for you. I won't include one here as a component with a cost, but you might consider a dedicated computer if this is a shared imaging station in a lab or collection. An extra monitor can be helpful as well.
The WeMacro rail has its own software which works on macs and PCs (and mobile devices!) and can be operated with a wired or bluetooth connection. The StackShot will require another software to control it, but that can be accomplished with your stacking software.
For stacking, there are a few options. I prefer Zerene Stacker which can run from ~$200-$300 depending on the appropriate license for you. These licenses do not expire and you get updates for life as they release them. Other software like Helicon Focus, etc. are available.
One quick tip for quick stacking - I shoot all individual images in the highest resolution JPG that the camera offers instead of in raw. My rationale is that I do not edit lighting or color of individual slices anyway - if something happens mid-stack I can replace batteries, change angles, etc and shoot another stack. In the end, the stacking software is averaging pixels from these stacks, so the raw format information is really not being utilized for the final output. Using JPGs means that every slice of a stack (which might be 20-100 images) is only 3-4mb in size as compared to a raw file which will be 70-200mb. This helps reduce strain on your computer, makes the stacking time faster, and can help you save some on hardware if you do need to buy a new machine for this system.
The necessary expenses for a new system comes out to $2600-$2800
Peripherals and Optional Components
I will break up some additional items worth considering into two groups - those I strongly recommend, and those that are a bit more optional.
Strongly recommended
Rechargeable batteries - I have a 24 battery charger and Amazon Basics AA batteries that suite me well. This will probably run another $50 or so. I find it convenient to always have batteries available in the lab, and just have everyone swap out fresh batteries into the flashes and controller unit when their photo shoot is over.
Braided 3-5' USB-C cable. You will need one to connect your camera to your computer. I suppose this should be a required item, but most of us have a cable sitting around anyway. I like having a dedicated cable always with the system.
AC Dummy battery for camera. This is a great $25 to spend. I use this one, but there are a ton of brands that offer the same thing. I have not yet gone to a USB-C powered dummy battery, but I really want to. Some reviews scare me, but I think I will try it out soon enough.
Staging lights. You could use just about anything for this. A clip-on lamp on the side of your table, an extra light from a microscope, or some LED item like these that I use on my system. I leave these lights on and it lets me find my focus planes for the top and bottom of my stack much easier. These are not absolutely necessary but very nice and worth spending another $50 if you can spare it (though you can probably scrounge something up from a closet for free).
Stages and backgrounds. This is a bit of an art form as well. I have bits of foam laying around my lab that I use to make a stage for my imaging systems. I often start, though, with a photo grey card like this which helps to not mess up your white balance and give a nice solid background color.
Less necessary
USB-C power supply. I use a single power supply that has several USB-C and USB-A ports on it. This way I can plug in my computer, camera, lights, and rail all into one place on my desk and it only uses a single plug. This also makes travel easy and means I only need a single plug adapter if I travel abroad.
Pelican case or suitcase for travel. This system is nice and compact - and breaks down even smaller! If you are traveling to a collection or field station, you can easily take this system with you. A nice hard-shell case to pack this in will keep it all safe. These cases can be super expensive, but worth it if you are traveling frequently.
Zip ties for cable management
Small bubble level to keep your system aligned
Ultra-High Magnification
If you need more than 5x magnification, say for imaging minute features or to image slide-mounted preparations etc, then you can still use this same system and add to it the Laowa Aurogon lens system. This has been a game-changer for our lab to take character shots and to work on ~2mm beetles. You will need a few items.
Laowa Aurogon Lens kit (~$1350, make sure youg et the version for your camera)
Venus Optics Lens Tube Slip Rings (~$50, these hold the lens to the rail system)
2x Arca-style mounting plates (~$30 total, many brand options for these and they are optional. You could re-mount your camera and lenses every time you swap, but it is way easier to just keep a mounting plate on each and swap them out)
Starting Settings for Laowa Lenses
You will have to do some tweaking to get the system working perfectly for you. These are the starting settings that I post for members of my lab to take images with. The step sizes are what you set in the rail software (WeMacro or Zerene Stacker) for the different magnification points on the lenses. I recommend getting as close to the mark on the lens as possible and to avoid taking images, for example, between 2.5 and 3x. You may be able to increase these step sizes to take faster focus-stacks, but they have worked for me so far.
Laowa 100mm Macro Lens
Focus | 1:2 | 0.75:1 | 1:1 | 1.5:1 | 2:1 |
Magnification | 0.5x | 0.75x | 1x | 1.5x | 2x |
Step Size (mm) | 0.5 | 0.4 | 0.3 | 0.3 | 0.2 |
Approx. Flash | 1/128 | 1/128 | 1/128 | 1/64 | 1/64-1/32 |
Laowa 25mm Ultra Macro Lens
Focus | 2.5:1 | 3:1 | 3.5:1 | 4:1 | 4.5:1 | 5:1 |
Magnification | 2.5x | 3x | 3.5x | 4x | 4.5x | 5x |
Step size (mm) | 0.15 | 0.15 | 0.10 | 0.10 | 0.08 | 0.07 |
Approx. Flash | 1/32 | 1/32 | 1/16 | 1/16 | 1/8 | 1/8 |
Laowa Aurogon Lenses
Note: in the WeMacro software I use the micrometer (slow) setting instead of mm, so the numbers would be 10um instead of 0.01, etc.
Magnification | 10x | 20x | 35x | 50x |
APO (Aperture) | 0.3 | 0.3 | 0.4 | 0.45 |
Step Size | 0.015 | 0.005 | 0.005 | ? |


Comments